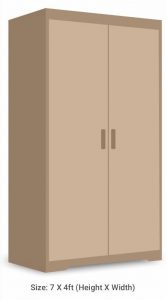
MATERIAL REQUIRED
» 18mm ECHON Wpc Board, Qty. 3nos, Size 8x4ft
» 12mm ECHON WPC Board, Qty. 1nos
» Hinges (Hydraulic or Thermal) 6 Set
» SS 202 Handle of 8″ or 10″
» Tower Bolt
» Fevicol Probond / Fevicol Heatex
» Wastage: 10%
TOOLS REQUIRED

Cutter, Drilling Machine, Scale, Marker
LETS GET STARTED
Before we start to make the wardrobe, prepare the space where you need to install it.

CUTTING
» To make the back part of the wardrobe, we will be using 12mm ECHON WPC Board. Cut it to 7ft length and keep the 1 x4 ft spare material for drawer making.
» Now, we will make front door and sides of the wardrobe using 18mm ECHON WPC board. Let’s take one sheet of 18mm ECHON WPC board and cut it to 7ft length and then divide it in two equal parts of 2ft width. We will be repeating the same process on one more sheet. Now we have 4 pieces of 7x2ft of ECHO N WPC Board.
» To make the top and bottom of the wardrobe, cut the 3rd WPC Board to length of 2ft, 2nos.
» To make the shelves and drawer, we will be using the leftover sheet. Cut the 4x4ft leftover of 18mm ECHON WPC Board to two parts.
» To make the drawers, use the leftover of 18mm ECHON WPC board, cut it to desired sizes and join using Fevicol Probond/ Fevicol Heatex.
ASSEMBLING
» Place thel 2mm 7x4ft to the wall and fix it by drilling and screwing. Now we will take the 7x2ft pieces and fix it to right and left side by using glue. Similarly, use 2x4ft pieces and fix it to the top and bottom.
» Sand the entire wardrobe before fixing the shelf and drawer so that the glue sticks properly.
» To make the drawer divider top, use one piece of 4x2ft and fix it from left to right (2ft from the bottom)
» Use the 2x2ft piece and fix it from bottom to top, fixing it with the drawer top.
» Now usethe remaining 2x2ft pieceto make one more drawer top on left section.
» Finally, install the door and hardware. The components are: WPC board 2pieces, drawer slides made of leftover WPC Board, pull handle and clothes rod.
FINISH
» We will use edge band to make the wardrobe look smooth and dowels/nail and screw to plug the holes left from the pocket holes to enhance the appearance.

DISCLAIMER
» The installation, material required and hardware shall differ depending on application and design.
